Setting up your printer
Have you configured your browser correctly for this site?
Before you start to use DX Despatch, ensure that you have configured your browser to allow pop-ups and the printing of spooled encrypted pages for this site. DX Despatch will not function correctly unless you have implemented this.
Pop-ups and printing encrypted pages
You may skip this section if you have already configured pop-up blocking and the printing of spooled encrypted pages for DX Despatch and move on to Setting up your printer further down this page. If your browser is Internet Explorer, carry out the following steps. Exact instructions may vary according to the version of Internet Explorer you are using. For help with other browsers, we suggest that you contact the organisation or individual who looks after your PC.
Open Internet Explorer
Click Tools.
Click Internet Options.
Click Privacy
Click Pop-up Blocker Settings.
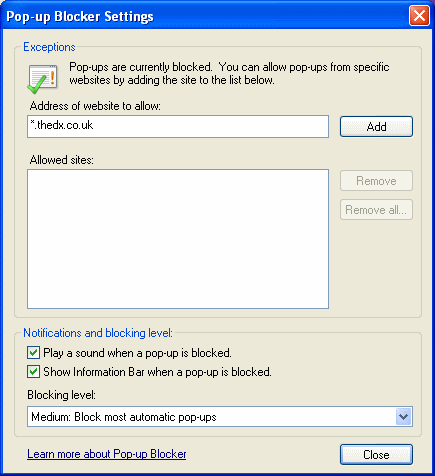
Enter the specific url in the Address of website to allow: text box. This must be *.thedx.co.uk as shown in the example below.
Click Add.
Close the window.
Click Tools.
Click Internet Options.
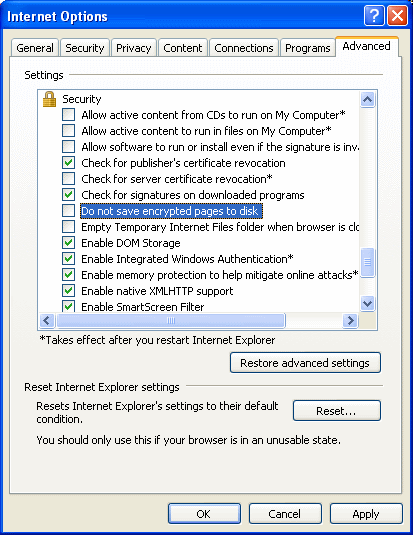
Click Advanced.
Scroll down the page until you reach Security.
Ensure the checkbox relating to Do not save encrypted pages to disk is unchecked, i.e. blank:
Click Apply.
Setting up your printer
1. You can use a plain paper printer or PDF option for all your DX Despatch printing needs, including delivery labels. However, if you intend to print large numbers of labels, we suggest that you use a dedicated label printer for your labels.
2. If you decide to use a dedicated label printer, we recommend that you use a Zebra GK420d or equivalent. Please discuss label printer availability with your DX depot Sales Manager. Until you install and configure a label printer, you will be limited to printing labels on a plain paper printer using this or the PDF print options from the DX Despatch print option menu.
3. Before you can print labels, you will need to ensure that you have installed all of the printer drivers that you need.
Plain paper printer. It is important that you have the driver currently recommended by the printer manufacturer installed on your PC. If you are unsure whether you need to do anything or if you need assistance installing a driver, please talk with the organisation or individual who looks after your printer. Our help desk is unable to provide any support.
PDF. Selecting PDF from the label print options will configure DX Despatch to create labels in PDF format and a label will display on screen as PDF. Print the PDF label on your local plain paper printer and once printed, delete the PDF label screen view. Please note unlike printing using the Default plain paper print option, printing PDF does not require the DX printer helper software to be installed first.
Dedicated label printer. We have designed DX Despatch to work with specialist label printers manufactured by Zebra. Zebra manufacture a wide range of printers. You need to ensure that the one you want to use makes use of Zebra's ZPL or EPL programming language. Please ask the organisation or individual who looks after this printer for you to check that the driver currently recommended for it by Zebra has been installed on your PC.
4. If you need to install a driver on your PC for your Zebra printer, you can find help and all the latest drivers on the Zebra web site. To go to the Zebra web site, click the link below.
Regardless of whether you are going to use a plain paper printer, a dedicated label printer or both, your must have successfully installed the appropriate driver(s) before moving on to the next stage of the installation process.
5. In order to automate the printing of labels as much as possible, we make use of an additional printer driver written specially for DX Despatch. We call this driver our printer helper. To download the printer helper, click the link below. If you are unfamiliar with this process, we suggest that you read the rest of this section of the user guide before you start the download.
6. To download the printer helper, click the link below.
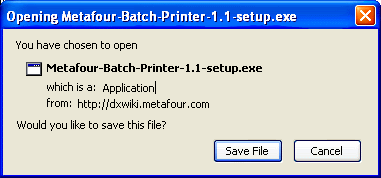
The messages you see below may vary according the operating system on your PC. For reference, those shown below are Windows XP.
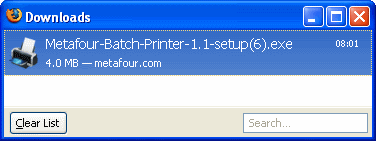
Click Save File. The printer helper setup program will now be downloaded and saved on your PC.
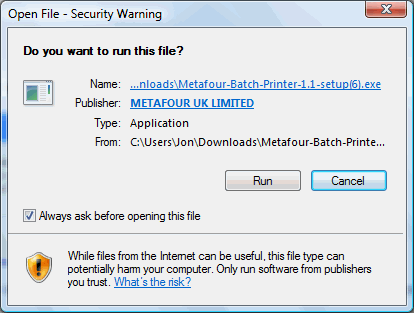
To run the setup program, double click on the program Metaafour-Batch-Printer-1.1-setup.exe
Once you have satisfied yourself that it is safe to run the setup program and that it will not harm your computer, click OK in response to the question Open Executable File?
Please check that the application you intend to install has a valid digital signature. You can do this by clicking on the publisher's name. If no valid digital signature is shown, do not continue with the installation. The lack of a valid digital signature means that the publisher of the setup program cannot be verified. Instead, contact the DX help desk for further assistance. Click Cancel to exit the program. Otherwise, you can complete the installation.
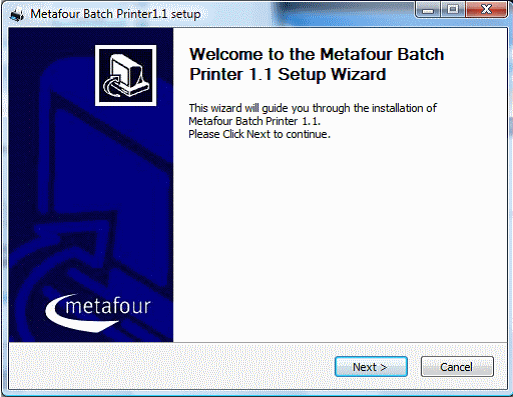
7. You are now ready to start the printer helper installation process. First, the Welcome window will display:
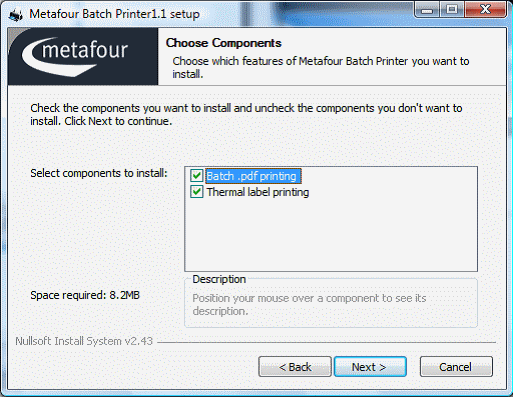
Click Next. This will take you to the Choose Components window:
Tick both boxes and then click Next.
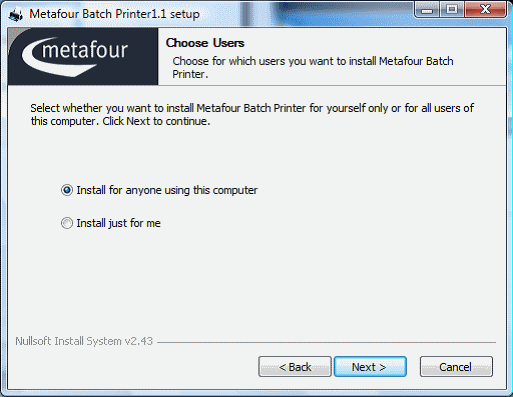
If you want to limit printing to a specific user of the PC, select Install just for me. Otherwise, select Install for anyone using this computer. In this context, user means a user ID required by the operating system, rather than by DX Despatch. Click Next to take you to the next step:
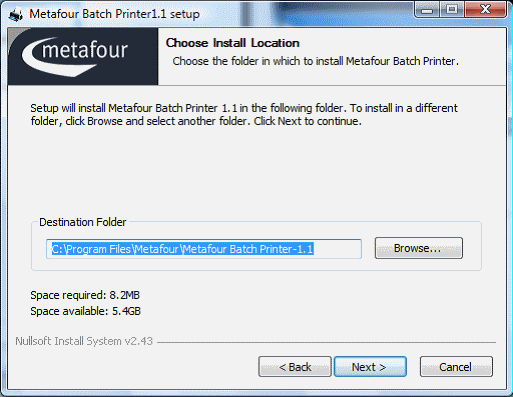
The program will suggest a destination folder for the installation. If you need further advice about choosing a folder, please ask the organisation or individual who looks after your PC for you. Then click Next to complete the installation.
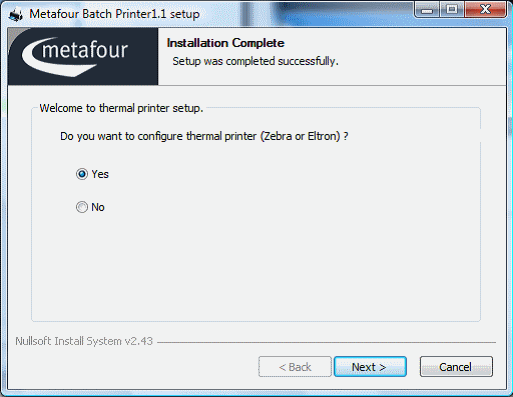
You have completed the installation of the printer helper. You now need to associate the printer helper with the dedicated label printer you intend to use within DX Despatch. If you intend to use a Zebra printer, select Yes, otherwise select No. Selecting Yes will take you to the Welcome to printer configuration window.
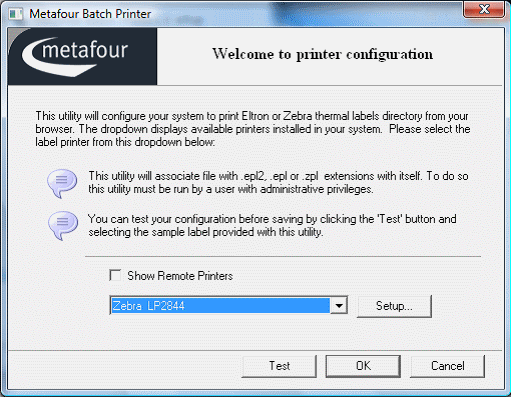
From the list of printers displayed, select the Zebra printer that you will use and click OK. Before clicking OK, you have an opportunity to configure the Zebra printer driver itself by clicking Setup. You can also test the printer by clicking Test and printing a sample label. Clicking OK will complete the installation and you should be ready to print labels from DX Despatch.
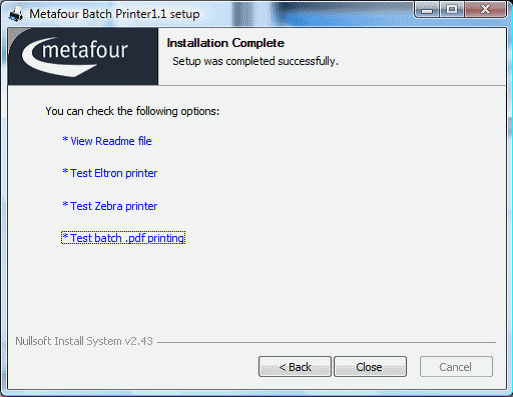
Before closing the Installation Complete window, you have a final opportunity to test printing.
